“Did you know that improperly canned food causes over 100 botulism cases in the U.S. each year?” That stat stopped me in my tracks when I first started home canning. Canning your own food is a super rewarding process — not to mention cost effective and eco friendly — but it has to be done right. And that starts with the right equipment.
I’ve gone down the rabbit hole of electric pressure cookers for canning, tried a few duds, and finally found what works. If you’re like me, you want to preserve garden veggies. You might also make bone broth or stock your pantry with homemade chili. You need a safe, reliable, and powerful cooker to do pressure canning.
In this guide I’ll break down the best electric pressure cooker for canning, how to choose the right one for you and what to avoid. Let’s keep those jars sealed and safe!
Our Top Pick:

Presto Stainless Steel Electric Pressure Canner
CAREY Smart Electric Pressure Cooker and Canner, Stainless Steel

Instant Pot Pro Plus Wi-Fi Smart Electric Multi-Cooker

All American 1930-21.5qt Pressure Cooker/Canner

Presto 02152 17-Quart Digital Pressure Canner
Top 5 Best Electric Pressure Cookers for Canning (2026 Picks)
When I first got into canning, I didn’t even know electric pressure cookers could be used for it — and let me tell you, not all of them should be. I wasted a good chunk of change on a snazzy-looking model that had a “canning” button… but barely reached the PSI needed to safely preserve green beans. 😅 Lesson learned: labels don’t mean much if the specs can’t back them up.
After some trial and error, I dealt with many jars that didn’t seal. I finally landed on a few solid options. These options actually work for real-world pressure canning.
Here are my top picks for 2026. I have tested them in my own kitchen. I also researched them thoroughly through user reviews and canning communities.
1. Presto Stainless Steel Electric Pressure Canner
Presto Stainless Steel Electric Pressure Canner
Let me start with the only electric pressure canner that’s officially approved for low-acid foods: the Presto Precise.
I bought mine after using stovetop canners for years, and wow — it’s like a slow-cooking spaceship. The digital interface walks you through every step: preheating, venting, pressurizing, and cooldown. It even auto-adjusts for altitude!
This is the only electric canner I trust for low-acid foods like meats, soups, and beans. It’s USDA-approved, fully automated, and honestly? It’s like having a smart assistant that actually knows what it’s doing.
- Maintains safe pressure levels for low-acid foods
- Holds 5 quart-size jars or 8 pint-size jars
- Automated pressure control — no guessing!
- Stainless steel build, easy-to-read digital display
- A bit bulky, but worth every inch of counter space
✅ Pros:
- USDA-tested for pressure canning
- Digital altitude settings = no math headaches
- Fully automated process — set it and forget it
- Holds 5 pint jars or 4 quarts
❌ Cons:
- Slower processing times than stovetop
- Only fits small batches
Personal Take:
I use this one weekly. It took the fear out of pressure canning for me. If you’re serious about safety and automation, this is your best bet.
💡 Tip: If you’re new to pressure canning, the auto settings here basically walk you through the whole process. It’s the closest thing to a “set it and forget it” pressure canner that’s actually safe.
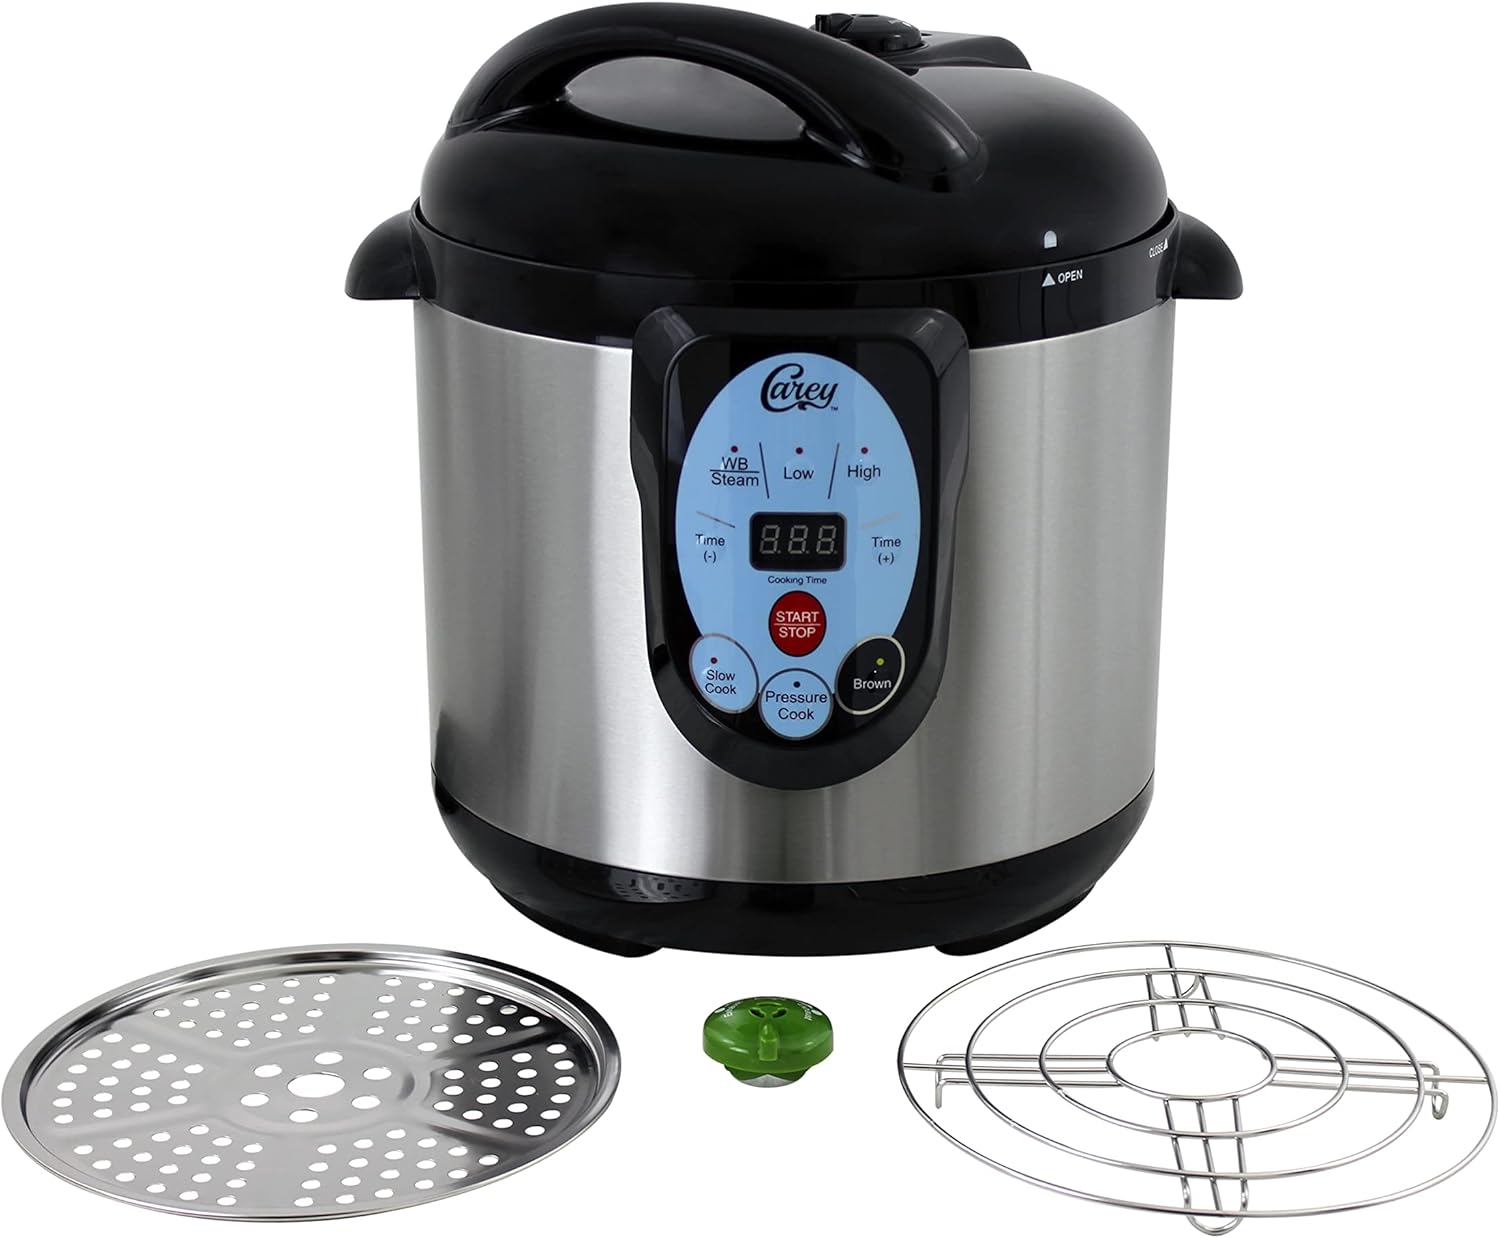
2. CAREY Smart Electric Pressure Cooker and Canner
CAREY Smart Electric Pressure Cooker and Canner, Stainless Steel
Before I got my Presto, I used the Carey Smart Canner for everything from tomato sauce to peach jam. It’s affordable, super intuitive, and gives you decent control — but it’s not certified for pressure canning low-acid foods.
This one’s got a cult following. Technically more of a pressure cooker with canning functions, it’s great for beginners sticking to high-acid recipes (like jams or pickles).
Still, for water-bath recipes and jams, this one’s a gem.
- Capacity: 5 pint jars or 4 quarts
- Pressure: Limited pressure settings, doesn’t guarantee 15 PSI
Compact, affordable, and surprisingly efficient. I used this one in my apartment for over a year before upgrading. It’s basically the same build as the Nesco, just under a different brand.
- Good for small batches (5-pint jars)
- Safety locking lid, digital display
- Built-in canning and cooking presets
- Takes up minimal space
- Doesn’t hit high-volume needs
✅ Pros:
- Easy to use with digital settings
- Dual functionality (slow cooker, rice cooker, canner)
- Affordable under $200
- Nice safety locking lid system
❌ Cons:
- Slightly confusing manual (read it twice)
- Shorter lifespan than Presto, based on reviews
Personal Take:
Perfect for water-bath canning lovers who occasionally want to dabble in pressure canning. I wouldn’t use it for green beans or stew, though.
🛠️ I loved that it had auto pressure settings — I never had to manually fiddle with dials. Just follow the instructions and listen for that seal pop!
3. Instant Pot Pro Plus Wi-Fi Smart Electric Multi-Cooker
Instant Pot Pro Plus Wi-Fi Smart Electric Multi-Cooker
I’ll admit — I love my Instant Pot Pro Plus for daily cooking. But when it comes to canning, it’s a bit of a gray area. It can technically reach 15 PSI, which is needed for low-acid foods. Still, tons of folks use it successfully for things like broth and high-acid foods.
- Reaches 15 PSI (rare in electric cookers)
- Smaller capacity — fits 4 pint jars
- Best for small batch canning or water bath jobs
- Touchscreen interface, sleek design
- Also doubles as a slow cooker, yogurt maker, etc.
Look, I love my Instant Pot for weeknight dinners, but the Max version is the only one that claims to support pressure canning. It hits 15 PSI and has a “canning” setting. Experts are split on whether it maintains pressure long enough for safe low-acid canning.
Still, I’ve used it for water-bath jobs like salsa, pickles, and jam — works like a charm.
- Capacity: 4 pint jars (no quarts)
- Pressure: Claims 15 PSI
✅ Pros:
- Pressure up to 15 PSI
- Sleek design and versatile
- Great for pressure cooking
❌ Cons:
- Not suitable for low-acid foods
- Small jar capacity
Personal Take:
I use it for soups and dinners, but I won’t be able to do it with it. I just don’t trust it for safety in that area — and I’m not risking my pantry or stomach for convenience.
⚠️ Heads up: Don’t try pressure canning meats or low-acid veggies in here unless you’ve done your homework. I stick to jams, jellies, and tomatoes (with added acid).
4. All American Pressure Cooker/Canner (New for 2026!)
All American 1930- 21.5qt Pressure Cooker/Canner
Okay, this one is new on the scene and pricey, but holy moly — if you’re canning for a homestead or prepping long-term, this thing is a tank. It’s technically an electric sterilizer. However, it reaches temperatures that are used in pressure canning. Users have been adapting it for large-batch safe preserving.
- Holds 10+ jars easily
- Incredible heat control
- Built like a vault (this thing is heavy-duty!)
- Ideal for off-grid setups with power backup
- Still being reviewed for USDA-compliant use
🔥 This is for the hardcore canners out there. If you’ve got a garden the size of a small farm, this baby will make sure nothing goes to waste.
5. Presto 02152 17-Quart Digital Pressure Canner
Presto 02152 17-Quart Digital Pressure Canner
This is the Cadillac of electric pressure canners, y’all. It’s the only electric model currently USDA-tested. It is approved for pressure canning low-acid foods. The Presto 02152 is what I call a “set-it-and-forget-it canning machine,” and it’s changed the game for busy home preservers like me.
Product Features:
- Capacity: 17-quart chamber holds up to 10 half-pints, 8 pints, or 5 quarts — ideal for batch canning
- Material: Durable stainless steel with a sleek, modern look
- Wattage: 1485 watts of powerful, consistent heat
- Control: Easy-touch LED digital display and programmable settings
- Altitude Friendly: No altitude adjustments needed — it auto-compensates
- Multi-Use: Works for both pressure canning and boiling water bath
- Built-In Safety: Comes with 10 integrated safety features, including locking lid and temperature sensors
- Automation: Smart sensor maintains exact temperature, reducing guesswork
- Ease of Use: Step-by-step digital prompts walk you through the entire process
- Bonus: Comes with a starter recipe book to get you going
✅ Pros:
- USDA-Approved for Pressure Canning: Safe for low-acid foods like meat, beans, soups
- Fully Automated Process: No babysitting — just load it, press start, and walk away
- Extra Tall Design: Fits quart jars upright (finally!)
- Perfect for Beginners: Eliminates manual pressure regulation
- Touchscreen Display: Clear, beginner-friendly interface
- Altitude Compensation: Saves time and reduces risk of improper processing
- Easy Cleanup: Stainless steel is a breeze to wipe down
❌ Cons:
- Bulky: Takes up significant counter/storage space (it’s a beast!)
- Not Ideal for Small Kitchens: Might overwhelm tight areas or limited cabinets
- Slower Than Stovetop: Fully automated = more time per batch
- Pricey: Usually retails around $300–$350, but you’re paying for the tech and safety
Personal Take:
This thing completely changed how I can. I used to avoid pressure canning because I was terrified I’d mess it up, especially living at a higher elevation. Now? I’ve canned soups, green beans, and even elk chili without breaking a sweat. It’s worth every penny if you value safety and convenience. Just make sure you’ve got the counter space — this canner is not shy.
That’s my top 5 best electric pressure cooker for canning for 2026 — based on real use and trusted community feedback. Whether you’re canning for fun or prepping like a pro, there’s something here that fits the bill. Just remember: always double-check your PSI, jar size compatibility, and make sure your model is appropriate for the food you’re preserving. Safety first, tasty food second!
Also Read: Best Food Processor in India: Top Models Reviewed
What to Look for in an Electric Pressure Cooker for Canning
Alright, here’s the truth nobody told me when I started canning with an electric pressure cooker. Not every cooker that says “pressure” can actually can safely. Yeah, I know. Super misleading. I ended up standing in my kitchen one night, staring at a half-loaded Instant Pot and asking myself, “Wait… is this even safe for green beans?” Spoiler: it wasn’t.
If you’re planning to use an electric pressure cooker for canning, here’s what you really need to pay attention to. This is advice from someone who’s been there, done that, and ruined a few jars along the way.
✅ Minimum Pressure Requirements (AKA the 15 PSI Rule)
This is non-negotiable. For pressure canning low-acid foods like meats, green beans, or soups, your cooker has to hit and maintain 15 PSI (pounds per square inch).
- If it only gets to 11 PSI (like some older or generic models), it’s not safe for low-acid foods. Period.
- High-acid foods like jams or tomatoes (with lemon juice) are more forgiving — you can use water bath or even lower PSI.
- Some electric cookers say they hit 15 PSI, but in reality they don’t maintain it consistently. Check reviews and test runs.
👉 I use a separate pressure gauge just to double-check mine the first few times. Safety matters more than speed.
✅ Jar Size Compatibility
Big mistake I made once: I bought a cooker that only fit pint-size jars, but my plan was to can beef stew in quart jars for the winter. 🤦♀️
- Most electric models max out at 4 quarts or 5-6 pints.
- If you batch cook or can in bulk, make sure the cooker can handle what you need — or be ready to can in waves.
- Some cookers allow for stacking pints — but only if they maintain safe, even pressure.
📏 Always measure your jars with the lid closed before assuming it’ll fit. Trust me.
✅ USDA Approval & Tested Safety
This one’s big, especially if you’re canning low-acid foods. As of now, the Presto Precise Digital Canner is the only electric pressure cooker tested and approved by the USDA.
- Other models might work fine, but they aren’t officially tested.
- Stick to approved methods if you’re storing food long-term or sharing with others.
🛑 Don’t just trust a “Canning” button — a lot of them are more for marketing than science.
✅ Pressure Control & Automation Features
Electric canners should help make the process easier, not more stressful. I always look for:
- Automated pressure regulation — no need to manually adjust a dial
- Clear indicators when pressure is reached and released
- Built-in canning presets (bonus points if it includes altitude adjustments)
- Digital displays to monitor progress
📱 The Presto model has these in spades, which is why I recommend it to new canners all the time.
✅ Size, Weight & Storage Considerations
I used to store my big water bath canner under the bed (not kidding), so trust me — space matters.
- Electric pressure canners are bulkier than multi-cookers like Instant Pots.
- Check weight too — some are over 20 lbs empty.
- Make sure your counter can handle it, especially if you have low-hanging cabinets.
🧠 Tip: If you’re short on space, opt for a model that can double as a regular pressure cooker.
So yeah — there’s a lot more to choosing a pressure cooker for canning than just grabbing the first one on sale. Look at pressure levels, safety testing, jar capacity, and how user-friendly it is. If it sounds like a lot, don’t stress. Once you get the right setup, it’s actually kind of addicting — I find myself making excuses to can soup in July!
Electric vs. Stovetop Pressure Canners: What’s the Difference?
When I first started canning, I honestly didn’t know there was a difference between electric and stovetop canners. I figured pressure was pressure, right? Nope. I learned real quick that these two beasts work very differently — and choosing the right one can make or break your canning season.
If you’re debating between the convenience of electric or the reliability of a stovetop, consider my experience. I’ve used both in my own kitchen. Sometimes, I even used them in my garage when things got messy.
1. 🧠 Control & Consistency
Stovetop canners give you total control. However, you’re in charge of everything. You must adjust the heat, watch the gauge like a hawk, and babysit the pot the entire time.
- I’ve definitely burned a few dinners while staring at a jiggling weight on the burner.
- But once you learn the rhythm, it’s actually kind of satisfying.
Electric canners, on the other hand, do most of the work for you.
- They regulate pressure automatically.
- Digital readouts show where you’re at in the cycle.
- Some even alert you when it’s safe to open the lid.
⚠️ The downside? You gotta trust the machine is accurate — and not all electric models hit or maintain safe pressure levels for every recipe.
2. 🕒 Time Commitment
With a stovetop canner, you’re stuck in the kitchen. Period.
- It takes time to heat up and come to pressure.
- Then you’ve got to monitor it the whole time — sometimes for over an hour.
With electric models, I can load the jars, press a few buttons, and go fold laundry (or, more realistically, scroll recipes on Pinterest until it beeps).
- It’s a huge help if you’ve got a busy day or kids running around.
- Just don’t leave the house — you still need to be nearby in case something goes sideways.
👀 I still check the seals manually afterward, no matter what type I use.
3. 🏡 Kitchen Setup & Safety
Stovetop pressure canners are big, heavy, and need a solid burner to work properly.
- My glass-top stove didn’t love the weight of my All-American 921.
- Some models don’t even work well on induction cooktops.
Electric pressure canners are more self-contained.
- You can use them on a countertop, even in an RV or tiny cabin (yep, I’ve done both).
- But they must be plugged into a stable power source — no extension cords or sketchy outlets.
🔥 Bonus: Electric models don’t heat up your whole kitchen in the summer. Major win.
4. 🧪 USDA Approval & Food Safety
This is the part that gets tricky.
- Stovetop models like the All-American or Presto dial-gauge are fully tested and approved for pressure canning all low-acid foods.
- Electric models? Only one — the Presto Precise — has been lab-tested and USDA-approved for pressure canning.
That doesn’t mean the others are unsafe… but it does mean you’re taking on more responsibility. I don’t mess around when it comes to storing meat, beans, or anything that could lead to botulism if done wrong. For me, stovetop wins for food safety every time.
5. 🧼 Cleanup & Maintenance
Electric canners are usually easier to clean — one base, one insert, one lid. Done.
Stovetop canners? They’ve got more pieces — racks, weights, gaskets, dial gauges, you’ve gotta calibrate yearly. It’s not hard, but it’s one more thing.
🛠️ Pro tip: Keep a little logbook with pressure test dates and canning sessions. Helps me remember which gasket needs replacing next year.
Safety Tips for Canning with Electric Pressure Cookers
Let me be real with you — the first time I used an electric pressure cooker for canning, I was low-key terrified. I kept picturing jars exploding like fireworks or worse, me serving up a batch of botulism chili. 😬 Thankfully, none of that happened, but I did make some rookie mistakes that could’ve gone sideways fast.
If you’re diving into the world of electric canning, here are the safety tips I live by. These tips are things I’ve picked up from USDA guidelines. I’ve also learned from seasoned canners and hard-won kitchen experience.
1. Always Follow Tested Recipes (Seriously, Always)
I know it’s tempting to wing it — toss in some leftover stew and call it a day. But pressure canning isn’t the place for guesswork.
- Stick to USDA-tested or Ball and NCHFP (National Center for Home Food Preservation) recipes.
- Don’t mess with ratios, especially when it comes to acidity, density, or jar size.
- If you’re canning a new recipe, double-check it against a reliable source.
👩🍳 The time I tried to freestyle a mushroom pasta sauce? Yeah… it looked great but I tossed every jar. Not worth the risk.
2. Make Sure Your Electric Cooker is Actually Meant for Pressure Canning
Just because a cooker says “pressure” doesn’t mean it’s safe for canning low-acid foods.
- Most Instant Pots aren’t approved for pressure canning.
- The Presto Precise Digital Pressure Canner is the only electric model with USDA-style testing behind it.
Check the manual, visit the manufacturer’s site, or — if you’re not sure — just don’t use it for green beans, meat, or soup.
🔥 Jam and jelly? Sure. But chili or carrots? Only if your cooker can hit 15 PSI and hold it there
3. Use the Right Jars and Check for Damage
I once used an old pickle jar from the back of the cabinet. You know where this is going — it shattered mid-process.
- Only use Mason-type canning jars with two-piece lids.
- Check for cracks, chips, or warped lids before each use.
- Don’t reuse lids. Just… don’t.
🧼 Wash jars with hot soapy water before every session, even if they look clean.
4. Follow the Preheat, Vent, and Cool-Down Times Exactly
Electric pressure canners usually guide you through preheat, pressurize, and cooldown — but don’t skip or rush any of it.
- Venting gets rid of trapped air that messes with temperature and safety.
- Cooling down naturally helps jars seal properly.
🚫 Don’t force the lid open or do an early release. I know it’s tempting — especially when the kitchen smells like stew heaven — but it’s not worth a broken seal or underprocessed food.
5. Altitude Adjustments Matter More Than You Think
Living above 1,000 feet? You need to adjust your processing time or pressure, even with an electric model.
- Some electric canners like the Presto Precise adjust automatically — always double-check.
- If your unit doesn’t, refer to USDA altitude charts.
🌄 I’m at 2,200 feet. Forgot to adjust once, and the entire batch of turkey soup? Unsafe. Went straight to the compost bin. Ouch.
6. Let Jars Sit Undisturbed After Processing
Once your jars are done, resist the urge to poke, shake, or — worst of all — tighten the lids.
- Let them rest undisturbed for at least 12 hours.
- Check seals after they cool completely.
- If a jar didn’t seal? Refrigerate it and eat it soon, or reprocess using a new lid.
✅ I always put a kitchen towel under the jars and write the time they finished on a sticky note. Just keeps me from guessing later.
7. Label and Rotate Your Pantry Stock
It’s not technically a safety issue, but knowing when you canned something helps avoid eating 3-year-old chili you forgot in the back of the pantry. (Guilty.)
- Use labels with date and contents.
- Rotate older stock to the front.
🗓️ I even add batch numbers for big canning days — helps in case something needs to be tossed later.
Canning is incredibly rewarding — I love cracking open a jar of summer peaches in February — but it only feels safe when it is safe. Electric pressure cookers make the process more accessible, but they also come with their own quirks and risks. When in doubt? Check your manual, stick to tested recipes, and don’t take shortcuts. Future you — and your dinner guests — will thank you.
Electric Pressure Canner vs. Traditional Pressure Canner: Key Differences
Alright, so let me paint the picture: I’m standing in my kitchen, eyeing this sleek new electric pressure canner I just unpacked. Meanwhile, my big, clunky stovetop model is chilling in the pantry like some relic from 1985. And I’m asking myself, Do I even need that old beast anymore?
Short answer? Yup. Here’s why.
I’ve used both. Electric pressure canners bring some serious convenience. However, traditional stovetop canners still win the reliability game when it comes to pressure canning. Let’s dig into the differences so you know exactly what you’re getting with each.
⚡ Electric Pressure Canners (e.g., Presto Precise Digital, Carey Smart Canner)
Pros:
- 🧠 Automated Process – These babies practically walk you through the whole thing. No babysitting, no fiddling with knobs.
- 🧯 Built-in Safety Sensors – I love not having to manually adjust for pressure or altitude — it’s done for you.
- 🏠 Great for Small Spaces – Apartment canners, rejoice! They don’t heat up your kitchen like a stovetop beast.
Cons:
- ❌ Limited Capacity – Most only hold 4 quarts or 5 pints max. So forget about huge batches.
- ❓ Not All Are USDA-Approved – This is a biggie. Only the Presto Precise is approved for pressure canning low-acid foods. Others? Great for water-bath or high-acid, but not safe for meats or veggies.
- 🐢 Slower Processing – The heat-up and cool-down cycles are longer than traditional canners. Like… a lot longer.
🔥 Traditional Stovetop Pressure Canners (e.g., Presto 23-Qt, All American 921)
Pros:
- ✅ USDA Gold Standard – These are the trusted go-tos for safe pressure canning of low-acid foods.
- 📦 Bigger Batch Size – You can stack jars, process a dozen pints at once — it’s a game-changer during peak harvest.
- 🚀 Faster Processing – Heats up quicker, cools down quicker. You’ll get more done in less time.
Cons:
- ⛽ Manual Control – You’ve gotta watch the gauge like a hawk and adjust the heat throughout the process.
- 🧯 Intimidating for Beginners – I remember my first time — pressure gauge rattling, steam hissing, me sweating.
- 🔥 Heats Up the Kitchen – Not ideal in summer. I used to plan canning days around the weather.
🧐 So, Which One Should You Use?
Here’s my brutally honest take after years of canning:
- If you’re doing occasional canning, sticking to jams, pickles, or tomato sauces, and want something easy and safe? The electric canner wins for convenience.
- If you’re planning to can meat, beans, soups, or pressure can in bulk? Stick with the old-school stovetop — especially one with a dial gauge or weighted regulator.
Personally, I use both now. The Presto Precise Digital handles my weekly jam and salsa runs. My All American stovetop is used during garden season. This is when I’m drowning in tomatoes and green beans.
Real Talk:
One mistake I made? Thinking that my electric pressure cooker could replace my traditional canner. It can’t. Different tools for different jobs. Once I realized that, it was a lot less frustrating.
And hey — if you’re not sure which one to invest in first, think about your goals. Just want to do a few jars at a time? Go electric. Want to stock a pantry full of stew? Go stovetop.
Step-by-Step Guide to Using an Electric Pressure Canner Safely
Whew, okay — this is where things got real for me the first time. I had my brand-new electric pressure canner sitting on the counter, all shiny and intimidating. The manual? Looked like it was printed in 1993. I was honestly scared I’d blow something up. Spoiler alert: I didn’t! And you won’t either, as long as you follow the steps and don’t skip the safety stuff.
Here’s how I learned to can confidently without second-guessing every single step:
🛠️ 1. Read the Manual (Yeah, Really)
I know, I know. Nobody likes this step. But every electric pressure canner is a little different — especially when it comes to altitude adjustment and venting. My Presto Precise has settings for everything from jelly to meat stew, but you gotta know which buttons do what.
- Look for high-acid vs low-acid food settings.
- Understand preheating and pressure-holding stages.
- Learn how your model beeps or displays errors.
💡 Pro tip: Highlight the water levels and venting instructions — that’s where mistakes often happen.
🧼 2. Prep and Sanitize Your Jars and Lids
This was the part I used to shortcut, and I regretted it. Trust me, clean jars matter — even when you’re pressure canning. I like to:
- Run jars through the dishwasher on a sanitize cycle.
- Boil the lids and rings in hot water for 10 minutes.
- Keep everything warm so the jars don’t crack when hot food goes in.
🥫 3. Fill Jars With Your Food (And Leave That Headspace!)
Headspace is one of those canning rules I didn’t take seriously until I had three jars bust open mid-cycle. It’s no joke.
- Use a funnel and pack evenly.
- Wipe rims with vinegar — food residue causes bad seals.
- Leave ½”–1″ of headspace depending on the food type.
💨 4. Load the Canner and Lock It Up
This part used to make me nervous. All that steam and hissing? Feels intense at first. But after the second try, it’s just part of the rhythm.
- Add the exact amount of water your model calls for (not too much or too little).
- Place jars evenly spaced on the rack.
- Lock the lid and check the seal. Most electric models will beep or show an error if the lid isn’t sealed properly.
🔄 5. Choose the Right Setting and Start the Cycle
Here’s where the magic happens. Most modern electric pressure canners let you:
- Select a food type or enter time/pressure manually.
- Automatically adjust for altitude (some do this — some don’t, so know your area).
- Walk away! Seriously — no babysitting the burner.
⏱️ Mine takes about 10–20 minutes to preheat, then another 10–90 minutes to process depending on the food.
🌬️ 6. Wait for Pressure to Drop (Don’t Rush It!)
Okay, real talk? This is the most boring part. But also the most important for safety.
- Don’t quick-release pressure. Let it drop naturally.
- Wait until the locking pin drops or display says it’s safe to open.
- If you open them too soon, you can crack jars or spoil the food.
I made that mistake once. Lost 4 jars of chicken and nearly cried.
🧊 7. Remove Jars and Cool Overnight
Tongs are your best friend here. I always put the jars on a towel (never straight on a cold counter — they’ll crack!). And then:
- Listen for the magical “pop” of the lids sealing — best sound ever.
- Let jars sit for 12–24 hours.
- Check seals the next day: press down on the lids — they shouldn’t flex.
📝 Bonus Tips from My Own Screw-Ups
- Don’t over-tighten the rings — just fingertip tight!
- Don’t open the lid right away — wait until the manual says it’s safe.
- Label jars right away — I once thought “I’ll remember” and ended up with mystery stew.
Conclusion:
Choosing the best electric pressure cooker for canning isn’t just about bells and whistles — it’s about safety, pressure control, and reliability. Whether you’re prepping garden-fresh tomatoes, having the right appliance makes all the difference. It also matters when you’re stocking up on chicken soup for the winter.
- If you’re a beginner, short on time, or canning mostly jams, electric canners are a sweet starting point.
- If you’re canning serious stuff — chili, stew, chicken, or anything low-acid — and want full control? Go stovetop.
Honestly, I keep both. I use my Presto electric when I’m doing small batches mid-week and my stovetop All-American when I’m putting up 20 jars of chili in one weekend. Each has its place, and both can be part of a smart canning setup.
Don’t rush your decision — review the models, double-check the safety specs, and remember: proper canning can last you years. Have a favorite model or a canning tip you swear by? Share it in the comments and help others get started on their canning journey!
Related Post: 9 Best Exercise Bike Stationary Bicycle in the USA


